Android provides a feature to make our application bidirectional (LTR
& RTL). This feature was introduced in android 4.1 (Jelly Bean) for
TextView and EditText elements, allowing apps to display and edit text in both
left-to-right (LTR) and right-to-left (RTL).
There was full support for RTL feature in android 4.2 version. It makes
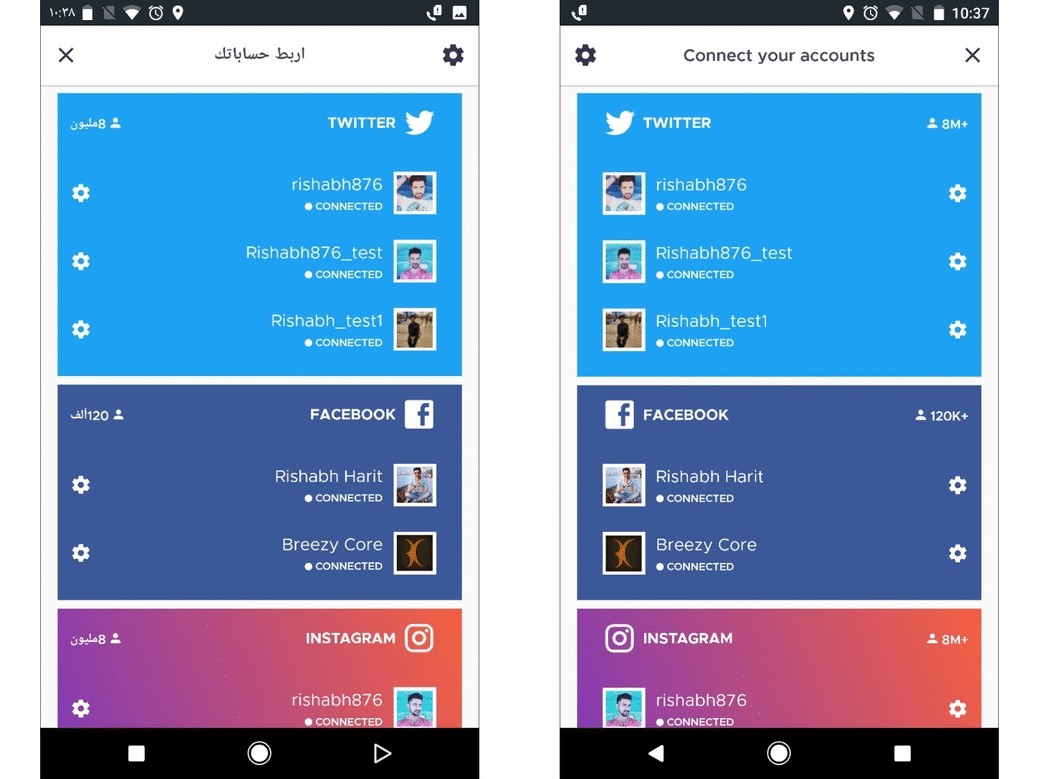
the exact mirror image of our existing layout.
Our application will continue to appear as we have set it in default
direction. But, with a few simple changes, application will be automatically
mirrored when the user switches the system language to a right-to-left script
(such as Arabic, Hebrew, or Persian).

Android 4.2 includes the
following APIs to help manage View components:
android:layoutDirection —
attribute for setting the direction of a component’s layout.
android:textDirection — attribute
for setting the direction of a component’s text.
android:textAlignment — attribute
for setting the alignment of a component’s text.
getLayoutDirectionFromLocale() —
method for getting the Locale-specified direction
Make these changes to support
bidirectional feature by android:
- Add - android:supportsRtl="true" to the <application>element in manifest file.
- Change all of app’s “left/right” layout properties to new “start/end” equivalents.
·
If you are targeting your app to Android 4.2
(the app’s targetSdkVersion or minSdkVersion is 17 or higher), then you should
use “start” and “end” instead of “left” and “right”. For example, android:paddingLeft
should become android:paddingStart
·
If you want your app to work with versions
earlier than Android 4.2 (the app’s targetSdkVersion or minSdkVersion is 16 or
less), then you should add “start” and end” in addition to “left” and “right”.
For example, you’d use both android:paddingLeft and android:paddingStart
Or
·
If you are using Android studio, then open your
project in Android Studio and follow the steps:
1.
Click on “Refactor” in android studio’s menu bar.
2. There will be a pop
with options, reach to the end of the menu and click on
“Add RTL Support
where possible”.
3. Now, you will get a
popup. Tick the checkbox accordingly.
Note: If you are not a developer
and still want to see the miracle then follow the steps:
- In your android phone, tap on “Settings” icon.
- Scroll down the list. You will get “Developer options”, if not then no need to worry follow: Settings > About device > Build number
- Once you’ve found the Build number section of the settings, tap on the section 7 times. Now there will be “developer options” before “about phone”
- Now tap on developer options and search for “Force RTL layout direction”.
- Tap on it to enable RTL feature.
This RTLUtils class helps us to know given View or Locale is RTL
package com.manakular.rajendhiran.lang;

import java.util.Collections;
import java.util.HashSet;
import java.util.Locale;
import java.util.Set;

import android.support.v4.view.ViewCompat;
import android.view.View;

public class RTLUtils
{

    private static final Set<String> RTL;

    static
    {
        Set<String> lang = new HashSet<String>();
        lang.add("ar"); // Arabic
        lang.add("dv"); // Divehi
        lang.add("fa"); // Persian (Farsi)
        lang.add("ha"); // Hausa
        lang.add("he"); // Hebrew
        lang.add("iw"); // Hebrew (old code)
        lang.add("ji"); // Yiddish (old code)
        lang.add("ps"); // Pashto, Pushto
        lang.add("ur"); // Urdu
        lang.add("yi"); // Yiddish
        RTL = Collections.unmodifiableSet(lang);
    }

    public static boolean isRTL(Locale locale)
    {
        if(locale == null)
            return false;

        // Character.getDirectionality(locale.getDisplayName().charAt(0))
        // can lead to NPE (Java 7 bug)
        // https://bugs.openjdk.java.net/browse/JDK-6992272?page=com.atlassian.streams.streams-jira-plugin:activity-stream-issue-tab
        // using hard coded list of locale instead
        return RTL.contains(locale.getLanguage());
    }

    public static boolean isRTL(View view)
    {
        if(view == null)
            return false;

        // config.getLayoutDirection() only available since 4.2
        // -> using ViewCompat instead (from Android support library)
        if (ViewCompat.getLayoutDirection(view) == View.LAYOUT_DIRECTION_RTL)
        {
            return true;
        }
        return false;
    }
}
To Identify RTL in Android:
Also, you can takes the Android Lint's help to fix up the RTL. Please refer and make use of the artifacts or library.
public static boolean isRTL() {
    return isRTL(Locale.getDefault());
}

public static boolean isRTL(Locale locale) {
    final int directionality = Character.getDirectionality(locale.getDisplayName().charAt(0));
    return directionality == Character.DIRECTIONALITY_RIGHT_TO_LEFT ||
           directionality == Character.DIRECTIONALITY_RIGHT_TO_LEFT_ARABIC;
}
Also, you can takes the Android Lint's help to fix up the RTL. Please refer and make use of the artifacts or library.
Happy Coding :)
